In the first part in this series, I divided a/c rejuvenation and retrofit work into six tasks:
- updating the compressor and bracket with a rotary-style compressor and whatever bracket is necessary to mount it to the block
- updating the old serpentine-flow condenser and fan with a modern parallel-flow condenser and a bigger fan
- cleaning and re-installing the evaporator assembly and expansion valve
- fabricating new hoses
- hooking up the electrical components
- leak-testing and recharging.
Of these, the evaporator work has the potential to be the most time-consuming and most nerve-wracking of all of the tasks.
Or it can be nearly no work at all.
Here’s why: On E30-era and later cars, the evaporator core and expansion valve can be accessed by removing the right side of the console and simply sliding them out, but in a vintage car like the 2002, Bavaria, E9, E12, or E24, the evaporator core, expansion valve, and blower motor are contained inside an evaporator assembly, a plastic tub with lower and upper halves. This assembly is mounted on the transmission hump. If a car has a long-dormant a/c system that you want to rejuvenate, and you’re staying with the original R12 refrigerant, and the system has remained closed, and when you remove the hoses to the compressor you find no evidence of contamination—no metal shavings or black goo fall out of the compressor line)—then perhaps you can leave the evaporator assembly alone, update the other components, leak-test, and recharge. But it’s a gamble.
However, if the system was left open—if, for example, the compressor was removed long ago to save weight and the hoses were left hanging, or if a hose was laid down on the exhaust manifold and melted—you’re foolish to go to all the work of a/c rejuvenation without flushing the system to remove contamination, and that requires removing the evaporator assembly, disassembling it, removing the expansion valve, and flushing the evaporator core. And if you’re doing that, you should probably just replace the expansion valve while you’re in there.
There are several other fulcrum points for the decision on whether to remove the evaporator assembly. First, if you are changing refrigerants (converting from R12 to R134a), you really should make sure that all of the old mineral oil is out of the system, and the best way to that is to disassemble and flush. You can’t really properly flush the evaporator with the assembly in the car, as the expansion valve restricts the flow when you pressure-flush with the proper flushing solution. You can try to “pop-flush” it, squirting in the pressurized flushing chemical until the pressure builds up and it sprays back out, but it’s really messy and of questionable efficacy.
Second, if you’re converting to R134a, some say that you should change to an R134a-specific expansion valve, which, on the cars I listed, requires removing the assembly.
Third, the evaporator assembly sits behind the heater box; in vintage BMWs, it’s extremely common for the foam to wear off heater box’s flaps, making it so that you can’t ever fully block off the flow of hot ambient air into the passenger cabin, which obviously impedes the performance of the a/c system. In addition, it’s common for the blower motors in heater boxes to die. The heater box has to come out to re-line the flaps with foam, and may have to come out in order to change the fan, depending on the model.
The point is that it’s kind of silly to pull the evaporator assembly and re-install it without doing the “while you’re in there” thing and addressing any needed issues with the heater box.
Last, and perhaps most important, taking the evaporator assembly out is simply a colossal pain in the ass, and in a vintage car, it risks damage to the assembly and to the parts you need to remove. The console has to come out, which shouldn’t be a big deal except that on a 45-year-old car, there’s risk of tearing the vinyl on the side pieces and having the ancient particle-board side pieces crack or dissolve. With a system that originally used R12, the hoses or hard pipes that connect to the evaporator are usually flare fittings, and they’re very tight; if they weren’t leaking, you run the risk of making them leak when you disassemble them and put them back together. In a car like an E9 or a Bavaria, there’s a plastic duct piece that connects the evaporator assembly to the heater box. This kind of 45-year-old plastic is very brittle and often shatters if you disturb it.
For these reasons, I’ve adopted the following approach: If the system was closed, and if I’m not converting from R12 to R134a, and if the heater box is working correctly, and if, when I pull the hoses off the compressor, I don’t find any contamination, then I roll the dice and leave the evaporator assembly alone. I did this with my Bavaria, and the gamble paid off; it has knee-freezing air-conditioning without my ever having touched the evaporator assembly. But if any of those assumptions is false, then I pull the evaporator assembly out, disassemble it, flush it, and replace the expansion valve.
Now, in the case of the Shark, I’m not rejuvenating a system, I’m doing a from-scratch retrofit. On the one hand, that means that I bought an evaporator assembly, so it was already out of the car, so I’d feel like a fool if I did not disassemble it, clean it, and replace the expansion valve, so that’s what I planned to do. But on the other hand, it means that since the car never had a/c, I needed to drill holes in the firewall for the hard lines that run behind the glovebox, which has to be my least-favorite part of from-scratch a/c installation. In addition, there’s a third hole that needs to be drilled in the transmission tunnel to allow the evaporator to drain.
As with any big project, at some point you just take a deep breath and have at it, piece by piece, a little bit each night.
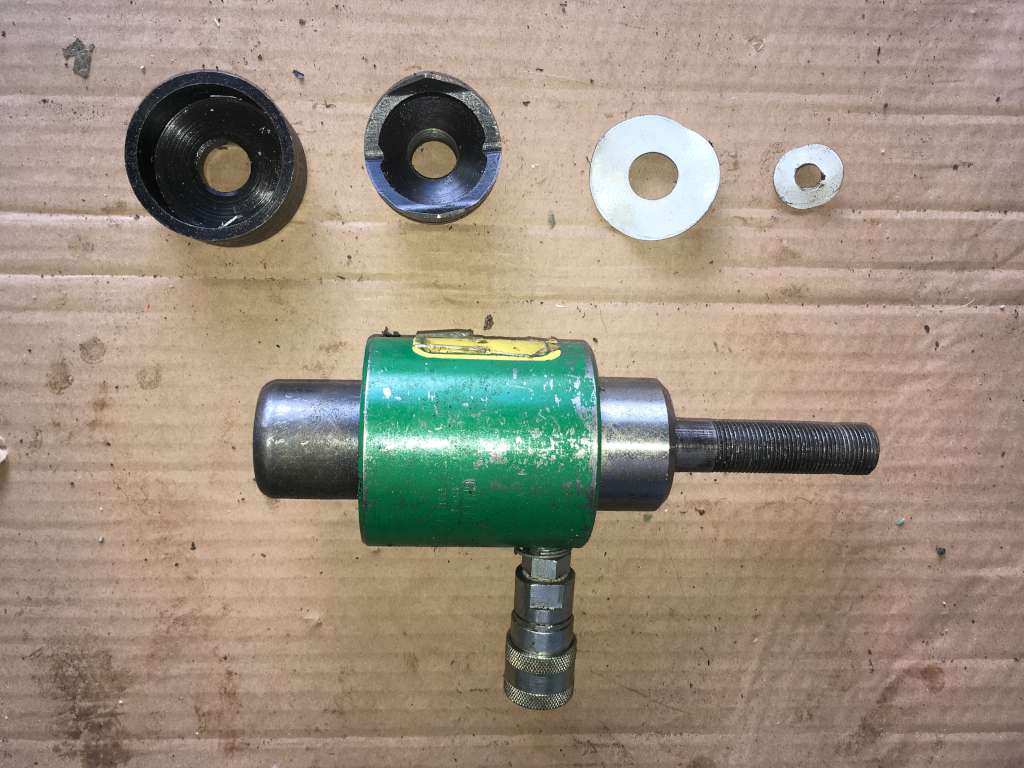
I took the evaporator assembly I’d purchased from Jonathan Stupar, hooked a battery to it to make sure that the blower fan worked, then disassembled it. I removed the expansion valve and flushed the evaporator core using a canister of a/c flush chemical in a container pressurized by my compressor and fed through an air gun with a rubber tip. By putting a rubber hose on the other end of the evaporator and feeding it into a jar, I was able to collect the waste chemical.

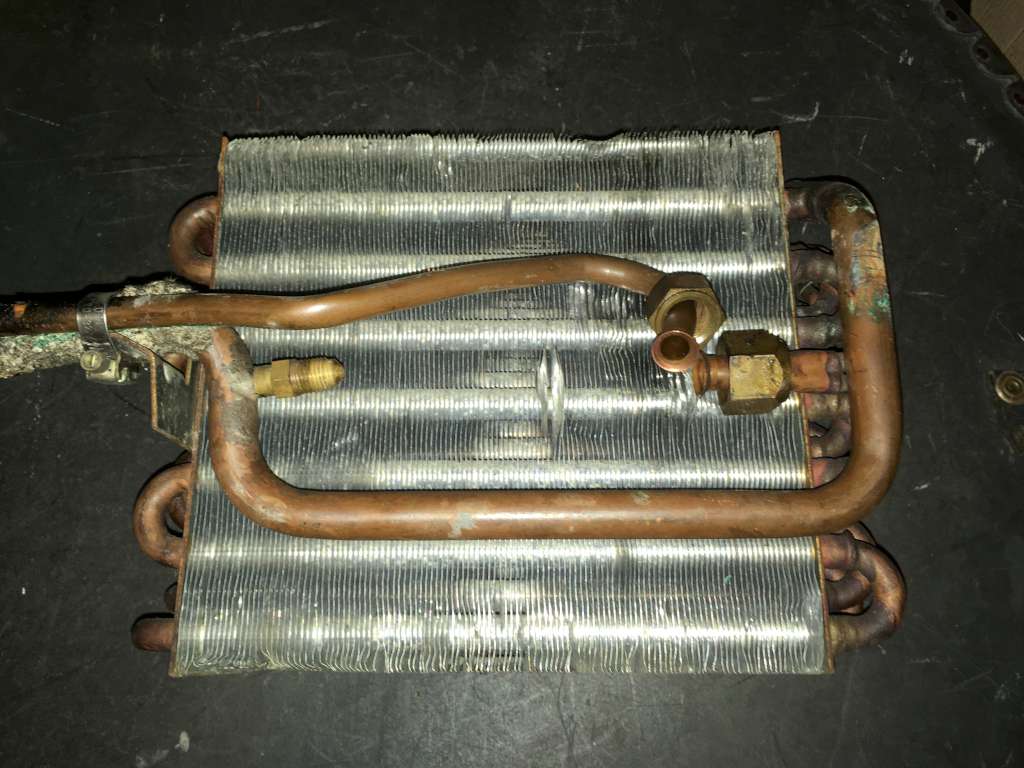
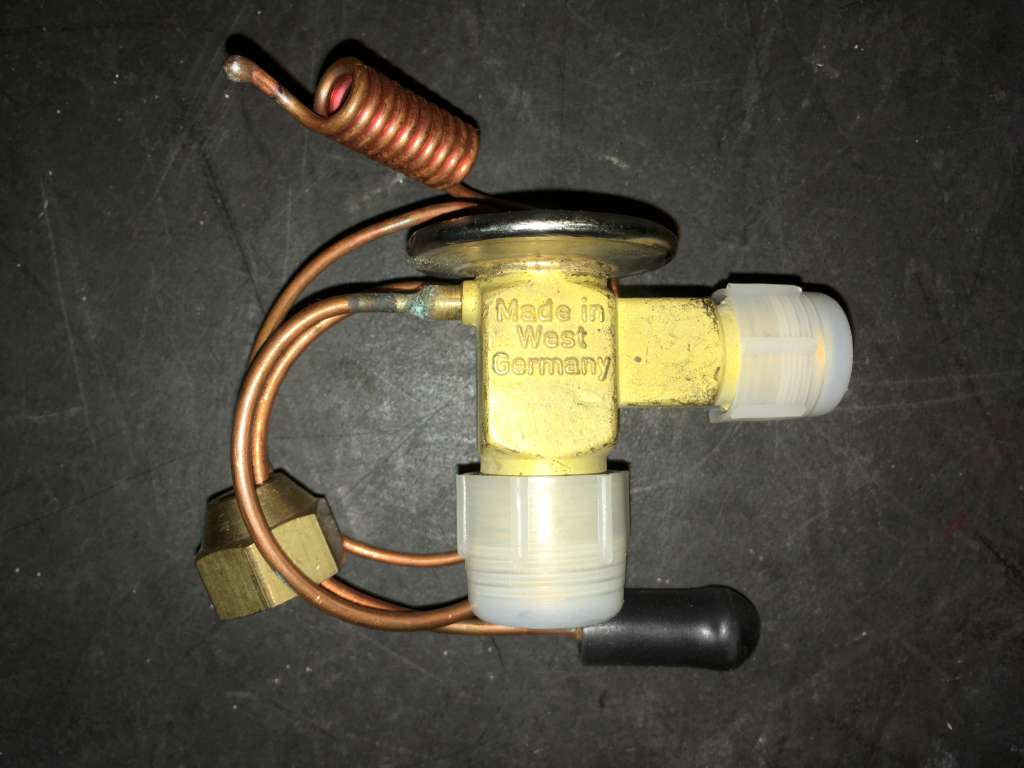
In these days of globalization, you never know where new parts are coming from, or what their quality is, so I was glad when I found a New Old Stock Egelhof expansion valve on eBay that said “Made in West Germany” on it like the one I was removing. I installed it using new copper flare crush washers coated with Nylog Red gasket and thread sealant, and tightened everything down. Note that when you tighten flare fittings, it’s very different than tightening O-ring fittings; the latter need only be tight enough to lightly squeeze the O-ring, which is what is actually doing the sealing. With flare fittings, though, it’s the copper-on-copper part that’s the actual sealing surface. You want them tight, but you need to take care not to crack the copper flares (been there, cracked that).

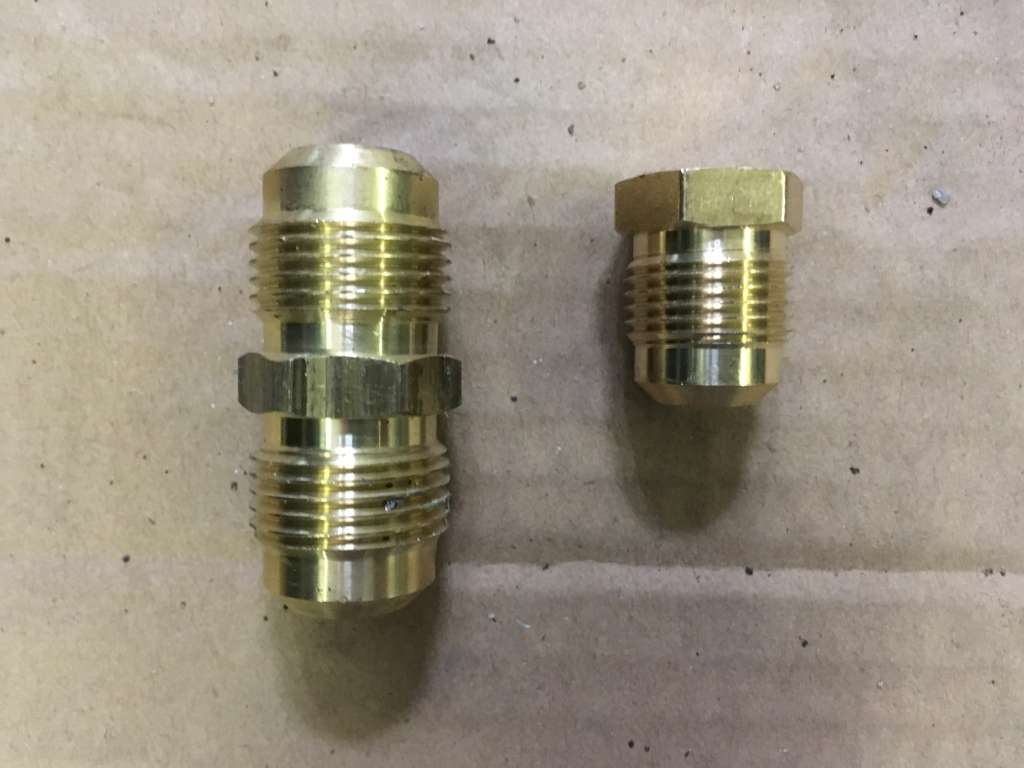
There are few things in the auto-repair world more frustrating than going to all the work to install or repair an a/c system—pulling the evaporator assembly out, rebuilding it, and reinstalling it—only to find that the evaporator core is leaking at one of the joints to the expansion valve, and the whole assembly has to come back out. So these days, I pressure-test a newly-assembled evaporator core and expansion valve. You need a ½-inch flare plug and a 5/8-inch flare union, both of which can be purchased at any hardware store. Then you need to make yourself a hose that has a 5/8-inch flare fitting and a charging port at one end, and has the other end blocked off. Then you connect the charging port to the blue (low-pressure) side of a manifold gauge set, and connect the yellow hose of the gauge set to a nitrogen bottle. This lets you pressurize the evaporator with nitrogen. Then you shut off the nitrogen, close the blue valve on the manifold-gauge set, and wait 24 hours to see if the pressure drops. I did have to snug down one of the expansion-valve fittings a little bit to get it to seal, but after that, it held pressure.


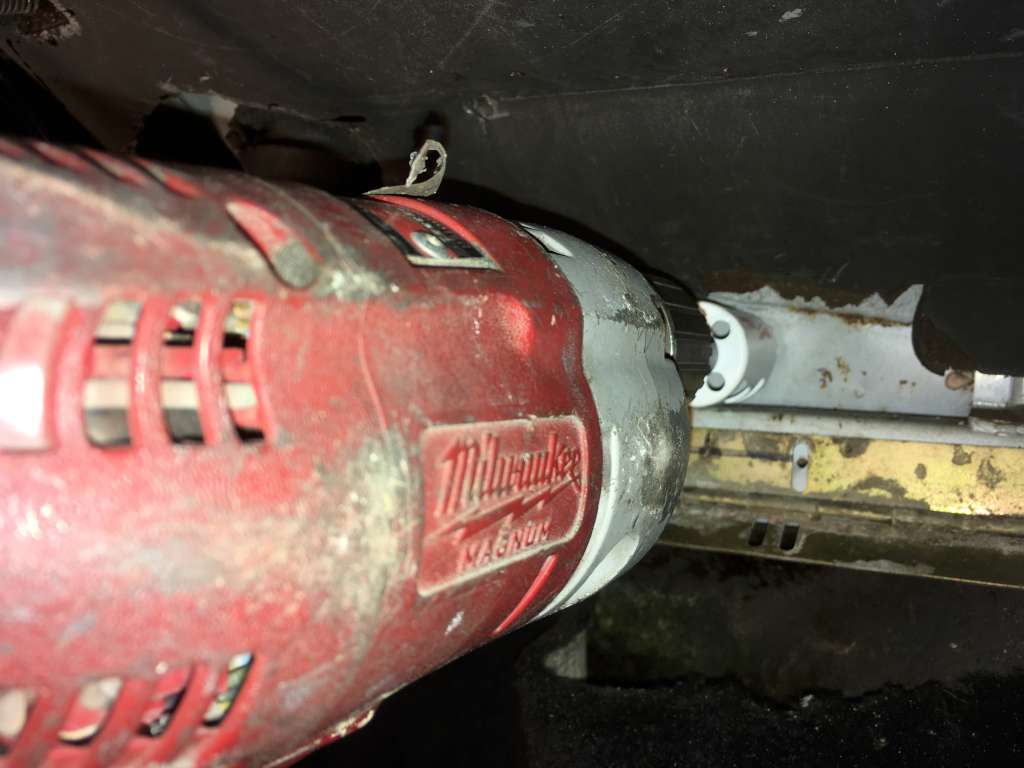
Finally, after avoiding it for weeks, I had to drill the holes in the firewall.
I first had to do this when I retrofitted a/c into my E9 nearly twenty years ago. For that, I was fortunate that a local acquaintance had an E9 parts car from which I could take careful measurements. I used a set of Greenley knock-out punches to make the holes, but you still need to drill pretty big pilot holes for the threaded rod that pulls the two halves of the punches together. I planned to use the same technique on the E24.
In this big, web-enabled world, I was certain that I could find a picture showing where the hard a/c lines went through the firewall on an early E12-based E24. I looked at every photograph I could find online of the engine compartment, and could see that the two hard-metal a/c lines emerged from the firewall at the right-hand corner, just to the left of the inner fender. However, owning to clearance issues, you can’t easily get a drill into that corner; you need to drill from the passenger-compartment side. Thus I needed photographs from under the glove compartment. To my surprise, I could find none online.
I put out the “Hack Mechanic needs photos and measurements” call to Facebook, and good guy Joseph Horák responded. He and I did the iPhone Facetime thing, something I find myself doing more and more often these days, although I’m usually on the giving rather than the receiving side. Joseph showed me where the hard lines went through his E12’s firewall above the glove box. We used the glove box hinge’s second screw hole from the right as a fixed point for some measurements. Joseph determined that the fatter of the two pipes was about 1.25 inches to the left of the screw, and about 1.375 inches above it. The center of the smaller, thinner pipe appeared to be about 2.375 inches to the left of the fat pipe.
Despite the obvious trepidation one has about drilling holes in the firewall of a car, the placement of the holes does not need to be millimeter-exact. The copper pipes can be bent, and there’s a good-size grommet between the pipe and the hole that offers a fair amount of play. The thing to do is drill a tiny test hole with a very small drill bit, secure in the knowledge that since the final holes need to be 1.5" and 1.25" in diameter, respectively, as long as any test holes are inside that diameter, you can drill as many of them as you want, choose one as a pilot hole, and when the final large holes are punched, all traces of the tiny test holes will be wiped from the face of the Earth.

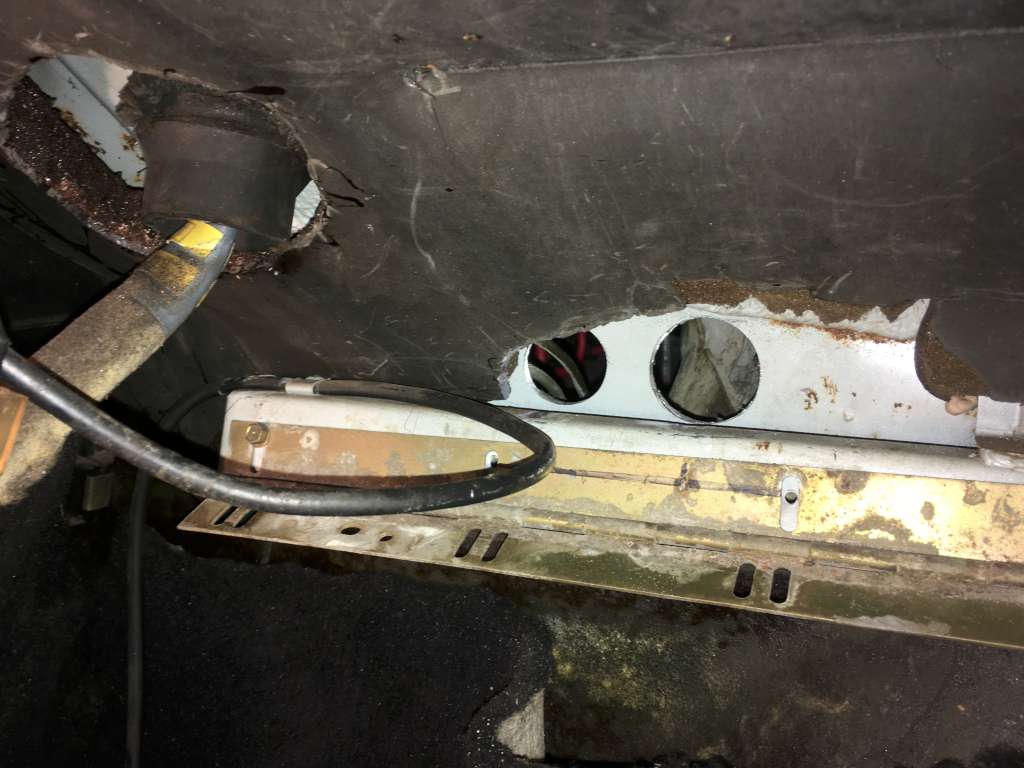
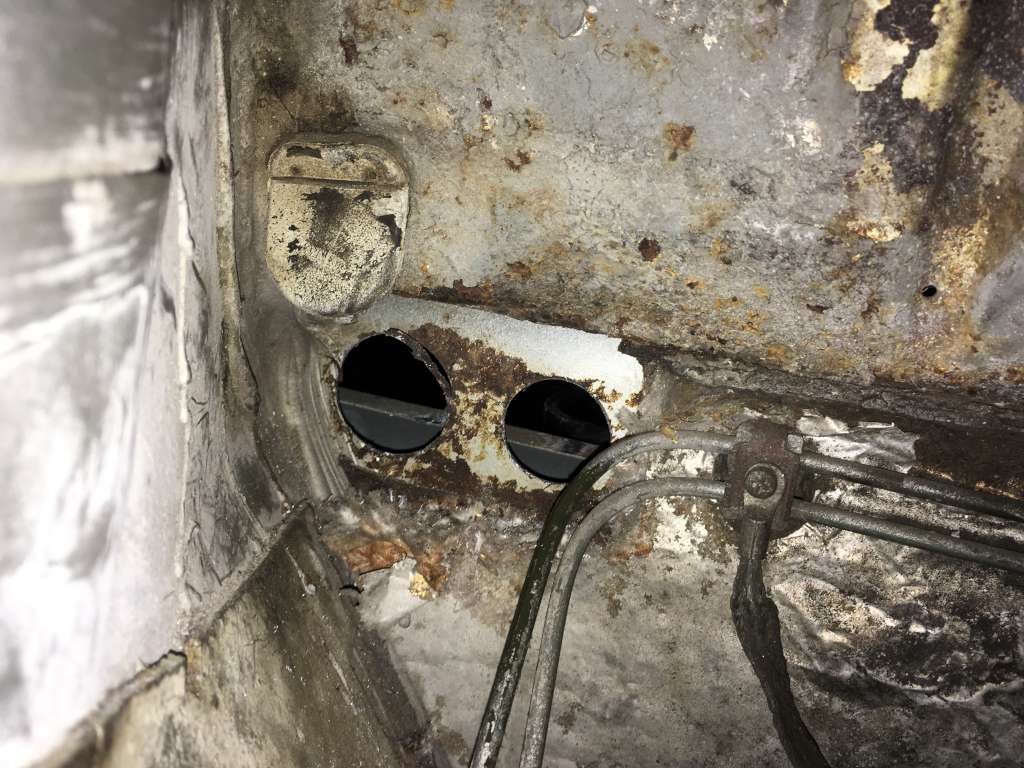
Once I marked and drilled the first test hole at the measurement point for the fat pipe, the area where the two pipes needed to come through the firewall was obvious, as it was bounded on the right by the inner fender wall, on the left by the brake lines, and on top by the ceiling of the firewall. It’s just that you have to drill from inside and you don’t have X-ray specs, so in order to get a reference point mapping the outside to the inside, you need that first little test hole.
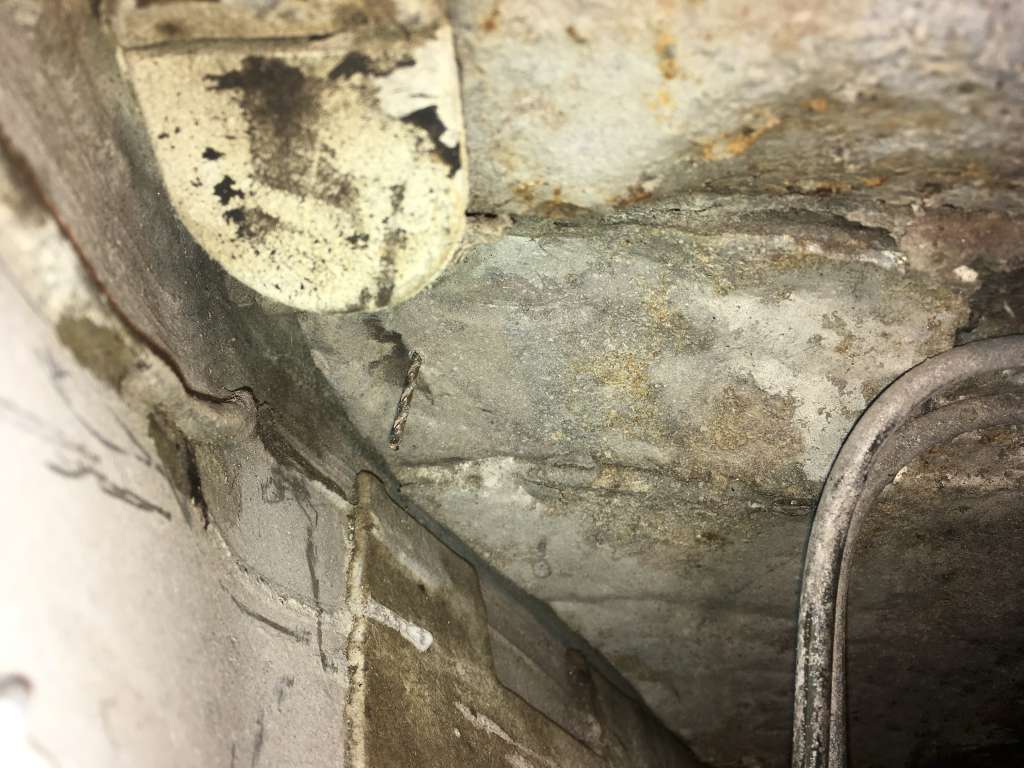
I then adjusted the location slightly, drilling a few additional test holes to move it away from the right inner fender and up slightly. In the picture below, with the firewall insulation cut away, the general area where the two holes need to go is obvious.

I began to ready the Greenley knock-out punch pictured below. In the punch case, I found two circular pieces of metal. I laughed when I thought they were from when I punched the holes in the E9’s firewall nearly twenty years ago, but then realized they were the wrong color. Each sized punch has an inner and an outer cup, pulled together by a pump-driven actuator to punch the hole. To use it, I’d need to widen the tiny test hole into a ½-inch pilot hole big enough to receive the punch’s threaded rod. Before I did this, though, I first began to test-fit the two halves of the punch both in the engine compartment and inside the car.
I found a problem: The outer shell of the punch hit the bracket that holds the glovebox hinge. The bracket is welded to the inside of the firewall, so there’s no easy way to take it off to get clearance for the punch. I looked at reversing the punch and putting the smaller inner shell inside the car and the larger one in the engine compartment, but the thicker part of the punch came very close to hitting the inner fender wall.
Suddenly, there appeared to be no easy way to use the punch. I thought that I might need to use a hole saw instead, and was very glad that I hadn’t drilled the monstrously large ½-inch pilot holes required for the punch, as they would’ve made it impossible to precisely position a hole saw that needed a much smaller pilot hole.
I found a 1½" hole saw in the basement, test-fit it inside the car, and found that if I moved the pilot hole upward slightly and angled the drill downward, there was just enough room to fit the hole saw above the hinge bracket. Unfortunately, this hole saw was either only for wood or was hopelessly dull. I did some quick reading online, found that Milwaukee Hole Dozer saws cut metal and are available inexpensively at Home Depot, and ran to a nearby store and bought the two I needed.
They say “measure twice, cut once.” This was more like “Measure a bazillion times, drill six test holes, and then pray that you cut once”—but the cutting part was done quickly.
I still need to drill the hole in the transmission hump and actually install the assembly, but that gives me something to do and write about next week.—Rob Siegel
Rob’s new book, Ran When Parked: How I Resurrected a Decade-Dead 1972 BMW 2002tii and Road-Tripped it a Thousand Miles Back Home, and How You Can, Too, is now available on Amazon. Or you can order personally inscribed copies through Rob’s website: www.robsiegel.com.